In 2013, I lived in a 650 square foot apartment with my wife.
One bedroom. One bathroom. A kitchen barely big enough for two people to stand in.
A living room that fit a couch and TV with maybe three feet of walking space.
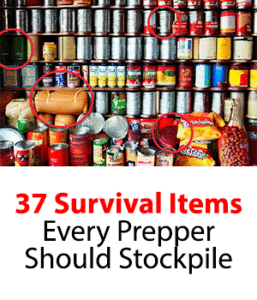
I was also trying to stockpile six months of food and emergency supplies.
My wife thought I was insane.
“Where exactly do you plan to put all this?” she asked, gesturing at our already-cramped apartment.
Fair question.
I didn’t have an answer yet.
Most prepping advice assumes you have a basement, garage, spare bedroom, or at minimum some extra closet space.
Reality?
Most Americans live in apartments, condos, or small houses without any of those luxuries.
Urban preppers especially face the challenge of building substantial stockpiles in spaces designed for minimal living.
But here’s what I discovered over the next year:
A tiny apartment has way more storage capacity than you think. You’re just looking in the wrong places.
I eventually stored 400+ pounds of food, 50+ gallons of water, complete medical supplies, tools, and emergency gear in that 650 square foot space.
My wife didn’t even notice most of it.
Guests had no idea they were sitting on or walking past survival stockpiles.
The secret wasn’t finding space, it was creating space where none obviously existed. Using vertical areas nobody thinks about. Repurposing furniture into storage. Hiding supplies in plain sight where they looked like normal apartment items.
I’ve been helping urban preppers solve storage problems since 2014.
I’ve consulted with people living in 400 square foot studios, shared apartments with roommates, and spaces even smaller than mine was.
Every single time, we found 10-15 hidden storage locations they’d never considered.
Let me show you exactly where those spots are and how to use them without your apartment looking like a prepper bunker or hoarder’s den.

Why Traditional Storage Advice Fails for Apartments

Before we dive into specific locations, you need to understand why most prepping advice is useless for apartment dwellers.
Standard prepper wisdom: “Store everything in your basement.” Great. Except apartments don’t have basements.
Ground floor units might have crawl spaces, but most apartments have concrete slabs. No basement access whatsoever.
“Use your garage for bulk storage.” Again, useless.
Most apartments have assigned parking spots or shared garages where you can’t store anything.
If you’re lucky, you get a 5×5 storage closet outside your unit. If you’re unlucky (like I was), you get nothing.
“Convert a spare bedroom into a prep room.” What spare bedroom? Most people are crammed into one-bedroom or studio apartments because that’s all they can afford. There is no spare room.
The fundamental problem: Traditional prepping assumes space abundance. Apartments assume space scarcity. Those two realities don’t align.
But here’s what changed my perspective: space isn’t about square footage. It’s about three-dimensional thinking.
When you can’t expand outward (more floor space), you expand upward (vertical space) and inward (hidden spaces within existing areas).
A 650 square foot apartment with 8-foot ceilings contains 5,200 cubic feet of volume.
That’s 5,200 cubic feet of potential storage if you know where to look.
The average prepper uses maybe 10-15% of that volume because they only think about floor space and obvious closets.
I learned to use the other 85%. That’s where hidden stockpile spots come in.
The Psychology of Hidden Storage
Before showing you specific locations, understand the psychology behind effective hidden storage.
Because it’s not just about finding space, it’s about using space without creating problems.
Problem 1: Visual clutter. Stack boxes everywhere and your apartment looks like a warehouse.
Landlords notice.
Guests comment. Fire marshals write violations.
You create suspicion and attention you don’t want.
Problem 2: Accessibility. Hide everything too well and you can’t access it during emergencies. What good is stored food if retrieving it requires moving furniture and climbing into attics during crisis?
Problem 3: Weight distribution. Apartments have weight limits, especially upper floors. Store 500 pounds of food in one spot and you risk structural damage or lease violations.
Problem 4: Moisture and pests. Apartments often have moisture issues and pest problems. Store food improperly and you lose everything to mold or rodents.
The solution: Distributed, invisible storage that looks intentional, stays accessible, distributes weight safely, and protects supplies from environmental damage.
When I finished optimizing my 650 square foot apartment, guests couldn’t tell I was storing anything unusual.
Everything looked like normal furniture and decor.
But I could access any supply within 60 seconds.
Weight was distributed across 12 different locations.
And nothing was vulnerable to moisture or pests.
That’s the goal. Not obvious prepper storage.
Invisible, functional, distributed storage that doesn’t compromise your lifestyle or draw attention.
Discover The 3 Sure-Fire SignsThat It’s About To Hit The Fan In Late 2025 Click HERE To Watch The Free Video
Hidden Spot #1: Under Beds (The Obvious One Done Right)
Everyone knows about under-bed storage. But most people use it wrong.
Standard approach: Shove random boxes under the bed. Hard to access. Attracts dust.
Looks messy if anyone glimpses under there. Wastes probably 40% of available space.
The right approach: Purpose-built under-bed storage that maximizes every inch.
I bought four 41-quart plastic bins with lids ($8 each at Target).
They’re exactly the right height to fit under standard beds with a few inches of clearance. Each bin holds about 30-35 pounds of food or supplies.
Total capacity: 120-140 pounds under one queen bed. That’s roughly 2-3 months of staple foods for one person, hidden completely from view.
What I stored under our bed: 50 pounds of rice in mylar bags, 25 pounds of pasta, 20 pounds of dried beans, canned goods, and basic medical supplies.
Four bins, perfectly organized, pulled out like drawers when needed.
The upgrade: Buy a bed frame with built-in drawers.
IKEA and Wayfair sell platform beds with 4-6 deep drawers built into the frame.
These hold 60-80 pounds per drawer and look like intentional furniture, not storage hacks.
Total cost: $300-600 for the bed, but it replaces your existing bed and adds 200-400 pounds of storage capacity.
Storage tip: Use bins that match your room decor.
Black bins, white bins, wood-colored bins, choose what fits your style.
Label the ends (not tops) so you can see contents when bins are pulled out.
Weight consideration: Beds can handle this easily. The bed frame distributes weight across multiple support points.
I never had issues with 140 pounds under our bed, and I’ve seen people store 200+ pounds under king-sized beds with no problems.
Discover The 3 Sure-Fire SignsThat It’s About To Hit The Fan In Late 2025 Click HERE To Watch The Free Video

Hidden Spot #2: Behind and Under Furniture
Furniture creates dead space, gaps between furniture and walls, space underneath couches, areas behind bookcases.
Most people never think about these voids. They’re perfect for flat or thin storage.
Behind the couch: The 3-6 inch gap between your couch and wall is wasted space. Flat cases of water bottles fit perfectly in this gap.
So do flattened mylar bags of rice or beans. So do emergency blankets, tarps, or other flat supplies.
I stored two cases of water bottles (48 bottles total) behind our couch.
Completely invisible from every angle unless you walked behind the couch and looked down.
Added bonus: the cases acted as spacers, keeping the couch from damaging the wall.
Under the couch: Most couches have 4-6 inches of clearance.
Flat plastic bins or cardboard boxes fit underneath.
These are harder to access than under-bed storage, so reserve them for items you don’t need often, backup supplies, seasonal gear, or long-term reserves.
I stored 40 pounds of pasta in flat boxes under our couch. Never saw them. Never thought about them. But they were there if needed.
Behind furniture: Dressers, bookcases, entertainment centers, all sit 2-4 inches from walls.
Flat mylar bags, emergency documents, important papers, or thin storage containers fit in these gaps.
I stored emergency cash, copies of important documents, and backup medications in waterproof bags behind our dresser.
Invisible. Secure. Accessible by pulling dresser forward 6 inches.
Inside furniture: Hollow furniture pieces like ottomans, storage benches, or coffee tables with lift-tops are obvious storage spots.
But also consider less obvious options: empty drawers in entertainment centers, unused space in closet organizers, gaps between drawer dividers.
We bought an ottoman with storage inside ($80) that held 30+ pounds of canned goods.
Guests used it as a footrest daily, completely unaware they were resting their feet on survival food.
Discover The 3 Sure-Fire SignsThat It’s About To Hit The Fan In Late 2025 Click HERE To Watch The Free Video
Hidden Spot #3: Vertical Wall Space (Going Up, Not Out)
Floor space is limited. Wall space is abundant. Most apartments have 8-foot ceilings. That’s 8 vertical feet you’re probably not using.
High shelving: Install shelves 6-7 feet high around room perimeters.
Most people don’t use space above 6 feet because it’s inconvenient for daily items. Perfect for long-term storage you rarely access.
I installed a shelf running the entire perimeter of our bedroom, 7 feet high. Cost about $50 in materials (boards and brackets).
Held 100+ pounds of stored food in matching bins. Looked intentional, like decor. Guests complimented the “design element.”
The trick: Use matching containers or bins that look aesthetically pleasing. Don’t throw random boxes up there.
Use uniform bins in colors matching your walls or decor. Arrange them neatly. It looks like intentional design, not storage desperation.
Above door frames: The space above doors is completely wasted in most apartments. It’s 8-12 inches of depth running the width of the door frame.
Custom shelves or boards mounted above doors can hold 20-40 pounds depending on door width.
I mounted a board above our bedroom door that held six 1-gallon water jugs.
Completely invisible from normal viewing angles. You’d only notice if you specifically looked up at the door frame.
Ceiling-mounted storage: Apartment ceilings can usually support 20-50 pounds with proper anchors.
Ceiling-mounted bike hooks, for example, can hold stored items in bags or bins suspended from the ceiling in closets or near room corners.
I hung two heavy-duty hooks in our coat closet ceiling and suspended bags containing sleeping bags, emergency blankets, and winter gear. Freed up floor space in the closet for food storage.
Landlord considerations: Most leases allow shelving and brackets as long as you patch holes when moving out.
Check your lease. If modifications aren’t allowed, use tension-mounted shelving systems that require no drilling.
Discover The 3 Sure-Fire SignsThat It’s About To Hit The Fan In Late 2025 Click HERE To Watch The Free Video
Hidden Spot #4: Inside Closets (Beyond Obvious Hanging Space)
Closets are obvious storage locations. But most people only use the hanging rod and maybe the floor. Closets have way more capacity than that.
Above the hanging rod: 2-4 feet of vertical space above your hanging clothes is wasted.
Install a shelf or use stackable bins to fill this space. Can easily hold 50-100 pounds depending on closet size.
In our bedroom closet, I installed a shelf above the hanging rod that held 80 pounds of food in bins.
Guests opening the closet saw normal clothes below and never looked up.
Below hanging clothes: Clothes hang 3-4 feet off the ground typically. That leaves 3-4 feet of vertical space below them.
Use this for stackable bins or shelving units.
I placed a 3-tier wire shelf under our hanging clothes that held canned goods, tools, and first aid supplies.
Completely hidden by the clothes above. Accessible by just pushing clothes aside.
Behind hanging clothes: Closets are usually 24 inches deep. Clothes hang maybe 10-12 inches from the back wall.
That’s 12 inches of hidden depth behind your clothes.
Flat storage bins or mylar bags fit perfectly in this space. I stored emergency documents, backup medications, and cash behind our hanging clothes.
You’d have to remove clothes from the rod to even see them.
Door-mounted organizers: Over-door organizers aren’t just for shoes. They can hold canned goods, first aid supplies, batteries, flashlights, or tools.
Each pocket holds 1-3 pounds typically.
I used a 24-pocket over-door organizer on our coat closet that held about 40 pounds of canned goods and emergency supplies.
Looked like normal storage. Freed up valuable floor space.
The floor: Most people throw random items on closet floors. Reorganize using stackable bins or drawer units.
Maximize vertical stacking instead of spreading items horizontally.
I used 5-drawer plastic units (the kind for clothes) to organize food on our closet floor.
Each drawer held specific categories, rice, pasta, canned meat, vegetables, etc. Stacked 5 high, they held about 150 pounds total while taking up only 3 square feet of floor space.
Hidden Spot #5: Kitchen Cabinets (Reorganized for Density)
Kitchen cabinets are food storage locations, but most people use them inefficiently. Reorganization can double or triple effective capacity.
Vertical stacking: Use shelf risers or stackable platforms inside cabinets. This creates multiple levels instead of single-shelf storage.
I added wire shelf risers ($10 for 2-pack) in our kitchen cabinets.
Doubled the effective storage by creating two levels where there was one.
Fit 30-40 more cans per cabinet.
Can organizers: Can dispensers or organizers designed for pantries let you stack cans 3-4 deep while maintaining visibility and FIFO rotation.
I used soda can dispensers (ironically) for soup cans.
Each dispenser held 12 cans in less space than 6 cans stacked normally.
Tripled density while improving accessibility.
Above cabinets: Most kitchens have 12-18 inches of space between cabinet tops and ceiling. This space is typically wasted or used for random decorative items.
I placed uniform bins on top of our kitchen cabinets (matching our cabinet color) that held 40-50 pounds of backup food reserves.
Looked intentional. Guests thought it was decor. It was food.
Inside large pots: If you have stock pots, dutch ovens, or large cooking vessels you rarely use, they’re wasting space.
Store smaller items inside them, bags of rice, dried beans in bags, or canned goods.
I stored 10 pounds of rice in sealed bags inside my stock pot. The pot sat in a lower cabinet looking normal.
Inside was food I’d never cook in that pot anyway.
Under sink reorganization: Most people waste 50% of under-sink space because of awkward plumbing.
Use tiered shelving or pull-out organizers designed for under-sink storage.
I installed a sliding under-sink organizer ($25) that created three levels of storage around plumbing.
Held cleaning supplies on top, water bottles in middle, and backup food on bottom. Tripled effective capacity.
Discover The 3 Sure-Fire SignsThat It’s About To Hit The Fan In Late 2025 Click HERE To Watch The Free Video
Hidden Spot #6: Bathroom Storage (Yes, Really)
Bathrooms aren’t just for toiletries. Many supplies store fine in bathrooms and free up space elsewhere.
Over toilet storage: The space above toilets is wasted.
Over-toilet shelving units ($40-80) add 3-4 shelves holding 50-100 pounds total.
I installed a 3-shelf unit above our toilet that held backup toilet paper, medical supplies, and extra toiletries. Looked like normal bathroom storage. Actually freed up space elsewhere for food.
Under sink: Same concept as kitchen, reorganize with tiered shelving.
Bathrooms under-sink areas can hold backup hygiene supplies, medical items, or even sealed food if space is critical elsewhere.
Linen closet reorganization: If you have a bathroom linen closet, reorganize it for density using bins and shelf dividers.
Most people waste 40-50% of linen closet capacity with poor organization.
I used vacuum-sealed bags for extra linens (compressed to 1/3 original size) which freed up two full shelves for medical supplies and backup toiletries.
Same items, 3x less space.
Behind toilet: The 4-6 inch gap between toilet tank and wall fits flat storage containers or bags.
Not ideal for frequent access, but works for long-term supplies.
Inside cabinets: If your bathroom has vanity cabinets, apply same principles as kitchen, vertical stacking, organizers, storing items inside other items.
Unconventional bathroom storage: Sealed, odor-free food items store fine in bathrooms.
I kept 20 cans of soup in a bin under our bathroom sink for two years. Never any issues.
Bathrooms get a bad reputation for food storage, but modern bathrooms are generally dry and stable if you’re not storing directly above shower steam.
Hidden Spot #7: Entryway and Hallway Spaces
Entries and hallways are transition spaces people barely notice. Perfect for hidden storage.
Hall closet optimization: Coat closets follow same principles as bedroom closets, above the rod, below hanging items, behind hanging items, door organizers, and floor space reorganization.
Our coat closet held winter coats (seasonal) plus 60+ pounds of stored food and emergency gear using these techniques.
Looked like a normal coat closet. Actually hid substantial supplies.
Entryway bench with storage: Benches designed for entryways often have storage underneath seats or inside lift-top designs. These hold 40-80 pounds depending on size.
We bought a bench with storage ($120) for our entryway that held 50 pounds of canned goods. Guests sat on it while putting on shoes, completely unaware of what was underneath them.
Narrow shelving units: Hallways usually have a few feet of empty wall space.
Narrow bookshelves (12 inches deep) fit against walls without obstructing traffic.
I placed a narrow bookshelf in our hallway that held books on the visible shelves and stored food in bins on the lowest shelf (hidden behind larger books). Held about 30 pounds while looking like normal decor.
Above hallway: Similar to above doors, the ceiling space in hallways can support mounted shelves or hanging storage for lightweight items.
Discover The 3 Sure-Fire SignsThat It’s About To Hit The Fan In Late 2025 Click HERE To Watch The Free Video
Hidden Spot #8: Creative Furniture Hacks
Some furniture can be repurposed or modified for massive hidden storage.
Platform bed builds: DIY platform beds are basically large boxes with mattresses on top.
Properly built, they can hold 300-500 pounds of storage underneath while looking like normal bed frames.
I didn’t build one myself (not handy enough), but I’ve seen friends store 400+ pounds of food under custom platform beds.
The entire bed is hollow underneath, accessed by lifting the mattress platform. Completely invisible storage.
Cost: $200-400 in materials if you DIY. $600-1,200 if you buy pre-made platform storage beds.
Storage ottomans/coffee tables: Furniture specifically designed with internal storage comes in every size and price point.
Look for pieces that support weight on top while providing storage inside.
Bookshelves as room dividers: In studios or large rooms, use tall bookshelves as room dividers.
Store supplies on the back-facing shelves (not visible from main living area) while displaying books on front-facing shelves.
Hollow furniture bases: Some furniture pieces have hollow bases or sides that can be accessed by removing backing panels.
End tables, dressers, or entertainment centers sometimes have hidden spaces.
I discovered our IKEA entertainment center had 8 inches of hollow space in the base, accessible by removing a thin panel.
Stored 25 pounds of supplies there for three years before moving out.
Hidden Spot #9: Vehicle Storage (Extended Apartment Space)
If you have assigned parking, your vehicle is effectively extended apartment space.
Trunk storage: Obvious but underutilized. Organized trunk storage can hold 100-200 pounds of supplies while leaving room for normal trunk use.
I kept complete 72-hour emergency kit in my trunk: water, food, first aid, tools, blankets, change of clothes.
Weight: about 40 pounds. Space: maybe 20% of trunk capacity.
Under seats: Many vehicles have space under front or rear seats for flat storage. Emergency supplies, backup tools, or first aid kits fit perfectly.
Behind seats: Pickup trucks or SUVs with space behind seats can hold storage bins or bags completely hidden from exterior view.
Temperature consideration: Cars experience extreme temperatures.
Store only items that tolerate heat and cold, water (in plastic, not glass), tools, first aid supplies, emergency blankets.
Don’t store food that degrades in heat or freezes badly.
Security consideration: Make storage subtle.
Visible supplies in vehicles attract break-ins. Use dark bins or bags.
Cover with blankets or cargo covers. Don’t advertise what you’re storing.
Discover The 3 Sure-Fire SignsThat It’s About To Hit The Fan In Late 2025 Click HERE To Watch The Free Video
Hidden Spot #10: Dead Corners and Awkward Spaces
Every apartment has weird architectural features that create dead space. These are opportunities.
Room corners: Place tall corner shelving units that utilize vertical space without taking up floor space.
These fit into room corners and provide 5-7 shelves of storage.
Sloped ceilings: Top floor apartments often have sloped ceilings that create low-height spaces.
These are useless for standing but perfect for low-profile storage bins.
Alcoves and nooks: Architectural features like alcoves, nooks, or recessed areas can be fitted with custom shelving or storage units.
AC/heating vents: Sometimes apartments have large vent covers or panels that hide mechanical spaces with extra room.
Not appropriate for food (temperature fluctuations), but can store tools, emergency gear, or supplies.
I found a panel in our coat closet that covered HVAC access.
Behind the panel was about 3 cubic feet of space around the ductwork.
I stored emergency tools and fire-starting supplies there. Lasted the entire lease without issue.
Between appliances: The gaps between fridge and wall, stove and counter, or washer and dryer often have 2-4 inches of dead space.
Slim rolling carts ($20-30) fit these gaps and provide multiple levels of storage.
Weight Distribution and Safety Considerations
Before you start filling every hidden spot, understand weight limits and safety.
Floor weight capacity: Most modern apartments support 40-50 pounds per square foot.
That means a 100 square foot room (10×10) can handle 4,000-5,000 pounds safely.
You won’t approach this limit with normal prepping.
But, distribute weight across multiple locations. Don’t put 500 pounds in one corner. Spread it across room perimeters, multiple rooms, and various heights.
Shelf weight limits: Wall-mounted shelves typically hold 20-50 pounds depending on mounting method.
Use proper anchors rated for your wall type (drywall, plaster, concrete). Don’t exceed rated capacity.
Furniture weight limits: Most furniture can handle 50-200 pounds. Beds handle more.
Check manufacturer specs if you’re adding substantial weight to any piece.
Fire safety: Never block exits, windows, or fire alarms with storage. Maintain clear pathways to doors.
Don’t stack combustibles near heat sources.
Accessibility during emergencies: If you can’t access stored supplies within 60-90 seconds during emergencies, they’re not stored effectively.
Test your access times. Adjust placement if necessary.
I made a rule: every stored supply must be reachable within 60 seconds without moving furniture or climbing.
This forced me to prioritize accessible storage over maximum density.
Organization Systems That Maintain Sanity
Hidden storage only works if you can find things when needed. Organization is critical.
Inventory system: Keep a simple spreadsheet or notebook listing what’s stored where.
Update when you add or remove items. During emergencies, you won’t remember that pasta is behind the couch.
I used a Google Sheet with columns for: Item, Quantity, Location, Date Stored, Expiration Date.
Updated monthly. Saved me countless hours searching for specific items.
Clear labeling: Label every bin, box, or container clearly.
Use labels visible from the angle you’ll access them (end labels for under-bed bins, side labels for shelves, etc.).
Category grouping: Store related items together. All medical supplies in one area. All canned vegetables together.
All rice and grains together. Makes inventory management and rotation easier.
FIFO rotation: First in, first out. Place newer items behind older items.
This ensures you use oldest supplies first and nothing expires unused.
Regular audits: Check your storage locations quarterly. Look for pest damage, moisture problems, expired items, or organization breakdown.
Fix issues immediately.
Discover The 3 Sure-Fire SignsThat It’s About To Hit The Fan In Late 2025 Click HERE To Watch The Free Video
What I Learned Living in 650 Square Feet
After a year of optimizing that tiny apartment, here’s what actually mattered:
Lesson 1: Small spaces force better organization. I became more organized living in 650 square feet than I ever was in larger spaces. Constraint forces efficiency.
Lesson 2: Invisible storage reduces stress. When guests couldn’t see prep supplies, nobody asked uncomfortable questions. When my wife didn’t see supplies everywhere, she didn’t complain about “hoarding.”
Lesson 3: Distributed storage is safer. Weight spread across 12 locations is safer than concentrated in one spot. And if one location gets discovered, damaged, or compromised, you don’t lose everything.
Lesson 4: Vertical space matters more than floor space. I eventually stored 60% of my supplies above 4 feet elevation. Under-bed, low shelves, and floor space held only 40%. Going vertical doubled my capacity.
Lesson 5: Furniture serves dual purposes. Every piece of furniture should provide storage or support storage. Single-function furniture is wasted space in small apartments.
By the time we moved out, I had:
- 400 pounds of food
- 50+ gallons of water
- Complete medical supplies
- Tools and emergency gear
- All in 650 square feet
- None visible to guests
- All accessible within 60 seconds
That apartment was smaller than most people’s basements.
But it worked because I stopped thinking about “storage space” and started thinking about “unused volume.”

Discover The 3 Sure-Fire SignsThat It’s About To Hit The Fan In Late 2025 Click HERE To Watch The Free Video
Common Mistakes Small-Space Preppers Make
I’ve seen people fail at apartment prepping the same ways repeatedly. Avoid these mistakes:
Mistake 1: Giving up before starting. “I don’t have space” is an excuse, not reality. You have space. You’re just not seeing it yet.
Mistake 2: Buying before planning. People buy supplies, then try to find space. Backwards. Map your space first, then buy quantities that fit.
Mistake 3: Obvious storage that creates problems. Stacking boxes in corners, filling closets floor-to-ceiling, blocking access to utilities, these create landlord issues and fire code violations.
Mistake 4: No organization system. Hidden storage without organization means you can’t find anything. Defeats the purpose.
Mistake 5: Ignoring weight distribution. Putting 300 pounds in one spot can damage floors, furniture, or structural elements. Distribute intelligently.
Mistake 6: Temperature-sensitive items in wrong locations. Storing chocolate near heaters, storing batteries in freezing garages, storing canned goods in hot attics, these ruin supplies.
Mistake 7: Not testing access. You think you can reach under the bed easily, until you’re trying during a power outage with a flashlight. Test everything.
I made Mistakes 2, 5, and 7 myself. Learned from each one. Now I plan space before buying, distribute weight carefully, and test access regularly.

Taking Action in Your Space
Stop thinking “I don’t have space.” Start thinking “Where’s the space I’m not using?”
This week: Walk through your apartment with fresh eyes. Look for these specifically:
- Under beds
- Behind furniture
- Above doors
- Inside closets (above and below hanging clothes)
- Space between furniture and walls
Identify three locations you could use for storage. That’s it. Just three.
This month: Start utilizing those three locations. Buy appropriate bins or organizers.
Move supplies from visible areas to hidden areas. Notice how much capacity you’ve created.
Next three months: Systematically work through your entire apartment. Map every potential storage location.
Reorganize furniture for better storage access. Build or buy furniture with integrated storage.
The goal isn’t filling every cubic inch. It’s creating enough hidden storage that your preps don’t dominate your living space or attract attention.
You can store substantial supplies in tiny apartments. I proved it in 650 square feet. Others have done it in studios half that size.
The space exists. You just have to see it differently.
Start today.
Find three hidden spots.
Use them.
Build from there.
Because small apartments aren’t obstacles to preparedness.
They’re opportunities to get creative, organized, and efficient.
Stay calm. Stay clever. Use every inch.